


So, instead of continuing to derail the "ordered" thread, I figured I would post my installation experience in a new thread.
I ordered my turf on Friday, afternoon (EST) I believe.
It has not shipped as of yet, but I started prepping already.
I took the OEM mats of the platform. The mats both came off easily, and intact. The did however, leave all the adhesive on the boat. So I spent a while peeling it all off by hand. Now my fingernails are sore.
I then started to remove the adhesive residue, but ran out of "goof-off". Now I have these globs of adhesive smeared around the platform.
I took some pics, and will post them tomorrow.
So far, I think I am like an hour into the process, but I don't know if everybody will need to do this.
EDIT: Can a mod fix the title for me?

20 replies to this topic
#1

jonw9
-
- Members
-

- 64 posts
Novice
- Year of DOO:1999
- Model of DOO:Speedster
- Engine in DOO:Twin 85hp Rotax (720)
#2
ssmedt
-

- Members
-
- 153 posts
Novice
- Water:Lake Oconee/Lake Lanier
- Year of DOO:2001
- Model of DOO:Challenger
- Engine in DOO:Twin 85hp Rotax (720)
Posted 06 May 2009 - 01:10 AM
I can't wait to see the pics, I installed mine today and it looks awesome!

EDIT: Can a mod fix the title for me?
#3
jonw9
-
- Members
-
- 64 posts
Novice
- Year of DOO:1999
- Model of DOO:Speedster
- Engine in DOO:Twin 85hp Rotax (720)
Posted 06 May 2009 - 07:27 PM
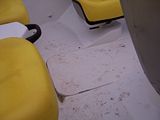
Alright, 2 more hours, and I got the OEM stuff off. For those keeping track, that is 3.5 - 4 hours peeling, scraping, and rubbing. I was worried I wouldn't be able to see where the new stuff goes, but luckily there was enough discoloration to see where the old stuff was.
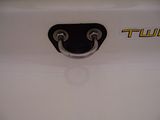
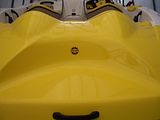
Existing OEM padding.
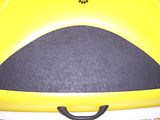
Swim platform, padding off, sticker still on
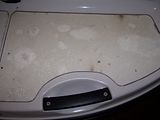
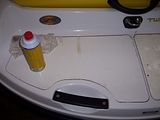
Swim platform, sticker off, removing adhesive
Platform finished
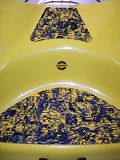
Step finished, note discoloration
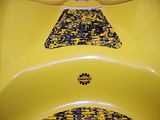
Top area finished, and discolored
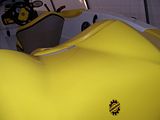
Another of the step
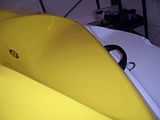
Tried to capture the discoloration on the platform. Should be a little whiter down the middle
Now I need to clean the inside, where I did all my engine work.
Existing OEM padding.

Swim platform, padding off, sticker still on

Swim platform, sticker off, removing adhesive

Platform finished

Step finished, note discoloration

Top area finished, and discolored

Another of the step

Tried to capture the discoloration on the platform. Should be a little whiter down the middle

Now I need to clean the inside, where I did all my engine work.

#4
ssmedt
-
- Members
-
- 153 posts
Novice
- Water:Lake Oconee/Lake Lanier
- Year of DOO:2001
- Model of DOO:Challenger
- Engine in DOO:Twin 85hp Rotax (720)
Posted 06 May 2009 - 11:07 PM
progress looks great  ; keep us updated
; keep us updated
#5
jonw9
-
- Members
-
- 64 posts
Novice
- Year of DOO:1999
- Model of DOO:Speedster
- Engine in DOO:Twin 85hp Rotax (720)
Posted 15 May 2009 - 05:00 PM
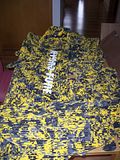
Got my turf today, 2 weeks exactly. i attribute this to the fact that the yellow camo is pretty new, and they didn't have my model pre-cut. There was no shipping notification, as stated in the order response.
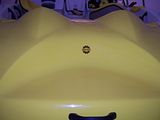
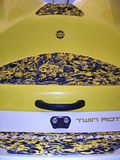
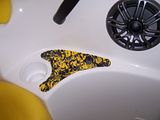
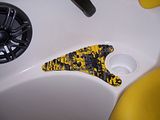
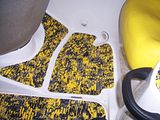
Rear platform. I requested white letters. I felt black, grey, or yeloow would not have looked right.
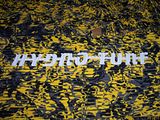
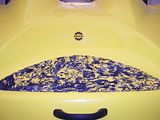
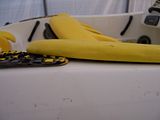
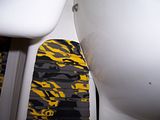
Here is a pice from the "step", which is the picture shown at the top in the above post.
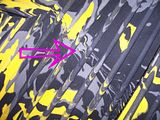
I am trying to show the size of the camo pattern. I only had a nickle handy. I think a bigger pattern would have been better, but I am happy with this.
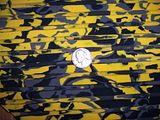
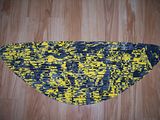
Table full of turf, trying to get the curl out of the long pieces.
A rough area where different colors meet. I am not going to send it back, as i think it is the nature of the pattern style. What do y'all think? It is really quite hard to see in the picture.
Rear platform. I requested white letters. I felt black, grey, or yeloow would not have looked right.

Here is a pice from the "step", which is the picture shown at the top in the above post.

I am trying to show the size of the camo pattern. I only had a nickle handy. I think a bigger pattern would have been better, but I am happy with this.

Table full of turf, trying to get the curl out of the long pieces.

A rough area where different colors meet. I am not going to send it back, as i think it is the nature of the pattern style. What do y'all think? It is really quite hard to see in the picture.

#6
ssmedt
-
- Members
-
- 153 posts
Novice
- Water:Lake Oconee/Lake Lanier
- Year of DOO:2001
- Model of DOO:Challenger
- Engine in DOO:Twin 85hp Rotax (720)
Posted 16 May 2009 - 05:56 PM
wow that looks great  can't wait to see the install pics; your pieces look pretty flat; do you have any that need to be flattened from shipping like i did?
can't wait to see the install pics; your pieces look pretty flat; do you have any that need to be flattened from shipping like i did?
#7
jonw9
-
- Members
-
- 64 posts
Novice
- Year of DOO:1999
- Model of DOO:Speedster
- Engine in DOO:Twin 85hp Rotax (720)
Posted 16 May 2009 - 10:10 PM
Yeah, the ski locker and a couple pieces were a bit curled.
They have been on the table for the last day with random items stack on top to flatten them out!
They have been on the table for the last day with random items stack on top to flatten them out!
#8
ssmedt
-
- Members
-
- 153 posts
Novice
- Water:Lake Oconee/Lake Lanier
- Year of DOO:2001
- Model of DOO:Challenger
- Engine in DOO:Twin 85hp Rotax (720)
Posted 17 May 2009 - 12:36 AM
Yeah, the ski locker and a couple pieces were a bit curled.
They have been on the table for the last day with random items stack on top to flatten them out!
haha yteah i found that that my old college text books were a great use for flating out my hydro turf.
#9
jonw9
-
- Members
-
- 64 posts
Novice
- Year of DOO:1999
- Model of DOO:Speedster
- Engine in DOO:Twin 85hp Rotax (720)
Posted 17 May 2009 - 09:18 AM
^My books are at work. I actually need them! 
I am debating whether or not to install today. The weather is supposed to only get near 60 F. I think I would like it warmer for better adhesion.
EDIT: I decided to do yard work today, and wait to install this week. It is supposed to be quite a bit warmer, plus I will ba able to get some acetone to really clean the areas before application.
#10
jonw9
-
- Members
-
- 64 posts
Novice
- Year of DOO:1999
- Model of DOO:Speedster
- Engine in DOO:Twin 85hp Rotax (720)
Posted 18 May 2009 - 07:55 PM
I finished the install tonight. Probably about 2 hours from start to finish. This included cleaning each area twice (cleaner and acetone) and placement. The acetone made the adhesion great. I don't know if I could have peeled of the pieces if I tried. There were some areas that needed trimming. This probably wouldn't be necessary for most boats, but the SK is a bit different.
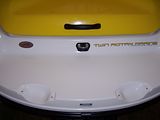
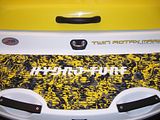
Back hood before application
More of the back
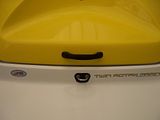
And more still
First piece down. Probably the most difficult, due to removing the backing from the letters.
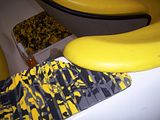
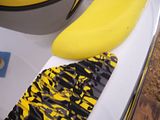
Second piece, on the step
Another look at the first two
Third piece, the pad in the transition
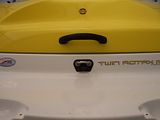
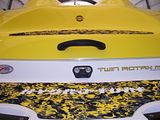
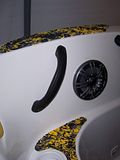
Finished rear hatch
Hatch open, showing rear of the boat
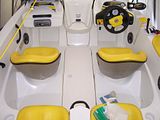
Empty interior
Back hood before application

More of the back

And more still

First piece down. Probably the most difficult, due to removing the backing from the letters.

Second piece, on the step

Another look at the first two

Third piece, the pad in the transition

Finished rear hatch

Hatch open, showing rear of the boat

Empty interior

#11
jonw9
-
- Members
-
- 64 posts
Novice
- Year of DOO:1999
- Model of DOO:Speedster
- Engine in DOO:Twin 85hp Rotax (720)
Posted 18 May 2009 - 07:56 PM
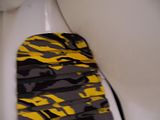
First piece, the ski locker. I peeled back the top third of the piece and stuck it down, then removed the bottom 23rds. It worked nicely
Slight issue with the starboard side piece.
To align with the "rough" area, it would need to go under the pad
I could move it back, but the contour isn't great.
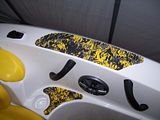
Moving on, the clean rear seating area
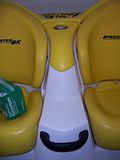
Port cupholder
and starboard side
Piece on the middle step area
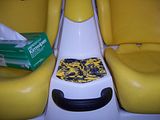
Port again
and starboard

Slight issue with the starboard side piece.

To align with the "rough" area, it would need to go under the pad

I could move it back, but the contour isn't great.

Moving on, the clean rear seating area

Port cupholder

and starboard side

Piece on the middle step area

Port again

and starboard

#12
jonw9
-
- Members
-
- 64 posts
Novice
- Year of DOO:1999
- Model of DOO:Speedster
- Engine in DOO:Twin 85hp Rotax (720)
Posted 18 May 2009 - 07:57 PM
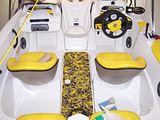
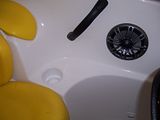
Port seating area, the next section done. You can also see the stereo and speaker I installed. The rear speakers can be seen in the previous 2 pics.
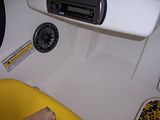
Slight interference with one piece. This probably won;t occur with other boats.
Port side done

I decided to trim the piece that didn't fit. I isn't great, but probably not noticeable.
Trimmed starboard piece. Did a little better job here.

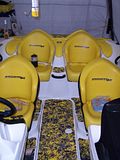
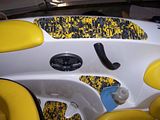
Finished the front section

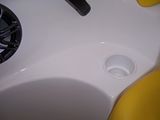
Last of the interior, the drain section (starboard)
Finished interior, looking forward
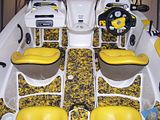
and looking back
Applied the port side piece

Slight interference with one piece. This probably won;t occur with other boats.

Port side done

I decided to trim the piece that didn't fit. I isn't great, but probably not noticeable.

Trimmed starboard piece. Did a little better job here.

Finished the front section

Last of the interior, the drain section (starboard)

Finished interior, looking forward

and looking back

Applied the port side piece

#13
jonw9
-
- Members
-
- 64 posts
Novice
- Year of DOO:1999
- Model of DOO:Speedster
- Engine in DOO:Twin 85hp Rotax (720)
Posted 18 May 2009 - 07:57 PM
Looking down on the port side
And the last piece. I decided to move it back, I wasn't super satisfied with my trimming earlier

And the last piece. I decided to move it back, I wasn't super satisfied with my trimming earlier

#14
Kevin Leclair
-

- SDSB Management
-

- 5,390 posts
SeaDooSportBoats.com Founder
- Water:Allatoona Lake
- Year of DOO:2010
- Model of DOO:210 Wake
- Engine in DOO:Twin Rotax 4-TEC SCIC
Posted 18 May 2009 - 08:01 PM
Install pics look great, congrats on the new turf! 
Need a shop or part manual for your boat or PWC? Join the SDSB Club here, http://seadoosportboats.com/join and download them here, http://seadoosportboats.com/manuals
Want to spread the word about SeaDooSportBoats.com and sport some official SDSB Gear? See what we have to offer here, http://seadoosportboats.com/gear
Want to spread the word about SeaDooSportBoats.com and sport some official SDSB Gear? See what we have to offer here, http://seadoosportboats.com/gear
#15
jonw9
-
- Members
-
- 64 posts
Novice
- Year of DOO:1999
- Model of DOO:Speedster
- Engine in DOO:Twin 85hp Rotax (720)
Posted 18 May 2009 - 08:22 PM
Thanks. It is looking pretty busy on the inside, with the small pattern.
I am glad I went with grooves. When the groove is cut, it adds variation to the pattern as the colors are even all through. I think cut diamond would make the patter even less uniform.
You can see what i am talking about up top, the picture with the nickel.
I am glad I went with grooves. When the groove is cut, it adds variation to the pattern as the colors are even all through. I think cut diamond would make the patter even less uniform.
You can see what i am talking about up top, the picture with the nickel.
#16
ssmedt
-
- Members
-
- 153 posts
Novice
- Water:Lake Oconee/Lake Lanier
- Year of DOO:2001
- Model of DOO:Challenger
- Engine in DOO:Twin 85hp Rotax (720)
Posted 18 May 2009 - 08:49 PM
wow that looks great and great work on the install! wait until you are out on the water it is awesome to stand on!
and great work on the install! wait until you are out on the water it is awesome to stand on!
#17
Phonsie
-

- Members
-
- 13 posts
Novice
- Water:Lake Michigan
- Year of DOO:2008
- Model of DOO:Speedster 200
- Engine in DOO:Twin Rotax 4-TEC
Posted 19 May 2009 - 09:13 AM
wow that looks great
I agree. Looks great. Good job sir.
#18
jonw9
-
- Members
-
- 64 posts
Novice
- Year of DOO:1999
- Model of DOO:Speedster
- Engine in DOO:Twin 85hp Rotax (720)
Posted 19 May 2009 - 10:27 AM
Thanks all. I will try to get more pictures when I get it outside.
After cleaning the floor areas, I was able to see just how dirty the rest of the boat is!
After cleaning the floor areas, I was able to see just how dirty the rest of the boat is!
#19
jonw9
-
- Members
-
- 64 posts
Novice
- Year of DOO:1999
- Model of DOO:Speedster
- Engine in DOO:Twin 85hp Rotax (720)
Posted 25 May 2009 - 02:51 PM
Finally got it onto the water today.
They wife says she likes the turf even better in the daylight (instead of the "barn") and it feet good under foot.
The water was quite cold, and it was a bit windy, so I don't know how it wet traction is.
She also said it sounded quieter, and i didn't even metion that as a possibility. i thought so too, but felt maybe it was in my head.
The definitely the first thing any new owner does to their boat. I wish I bought it sooner, but kinda glad I waited for the yellow camo color.
#20
ssmedt
-
- Members
-
- 153 posts
Novice
- Water:Lake Oconee/Lake Lanier
- Year of DOO:2001
- Model of DOO:Challenger
- Engine in DOO:Twin 85hp Rotax (720)
Posted 25 May 2009 - 09:08 PM
congrats; yeah i noticed a noise reduction also; and trust me the wet traction is like night and day to the way it use to be!


30 user(s) are reading this topic
0 members, 30 guests, 0 anonymous users


